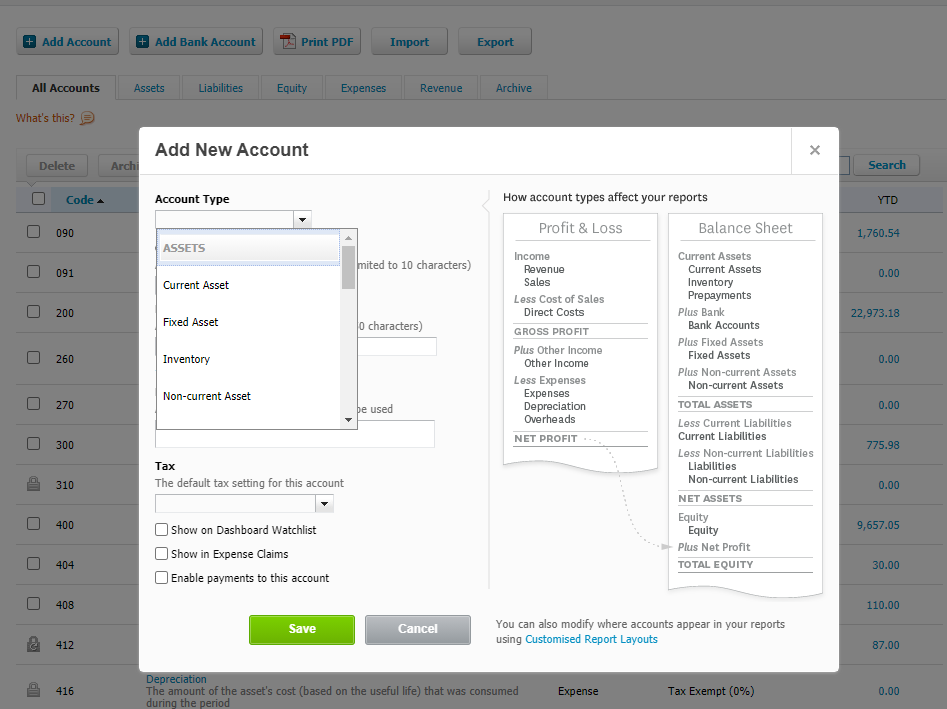
1. Set up a GST Payable account and a PST Payable account in Xero (one time only)
a. From your Xero Dashboard, click on “Accounting” and scroll to “Chart of Accounts” in the dropdown;
b. Click the “Add Account” button near the top of the screen. A new box will popup where you enter all your info regarding the new accounts.
c. Under Account type, select Current Liability. Select an account code. We suggest using one number up from your current sales tax account code. Enter “PST/GST Payable” depending on the account you are creating. Choose Tax Exempt under tax, and click the green Save button.
2. Set up a PST Commission account (one time only)
a. Follow above steps to set up a PST Commission INCOME account.
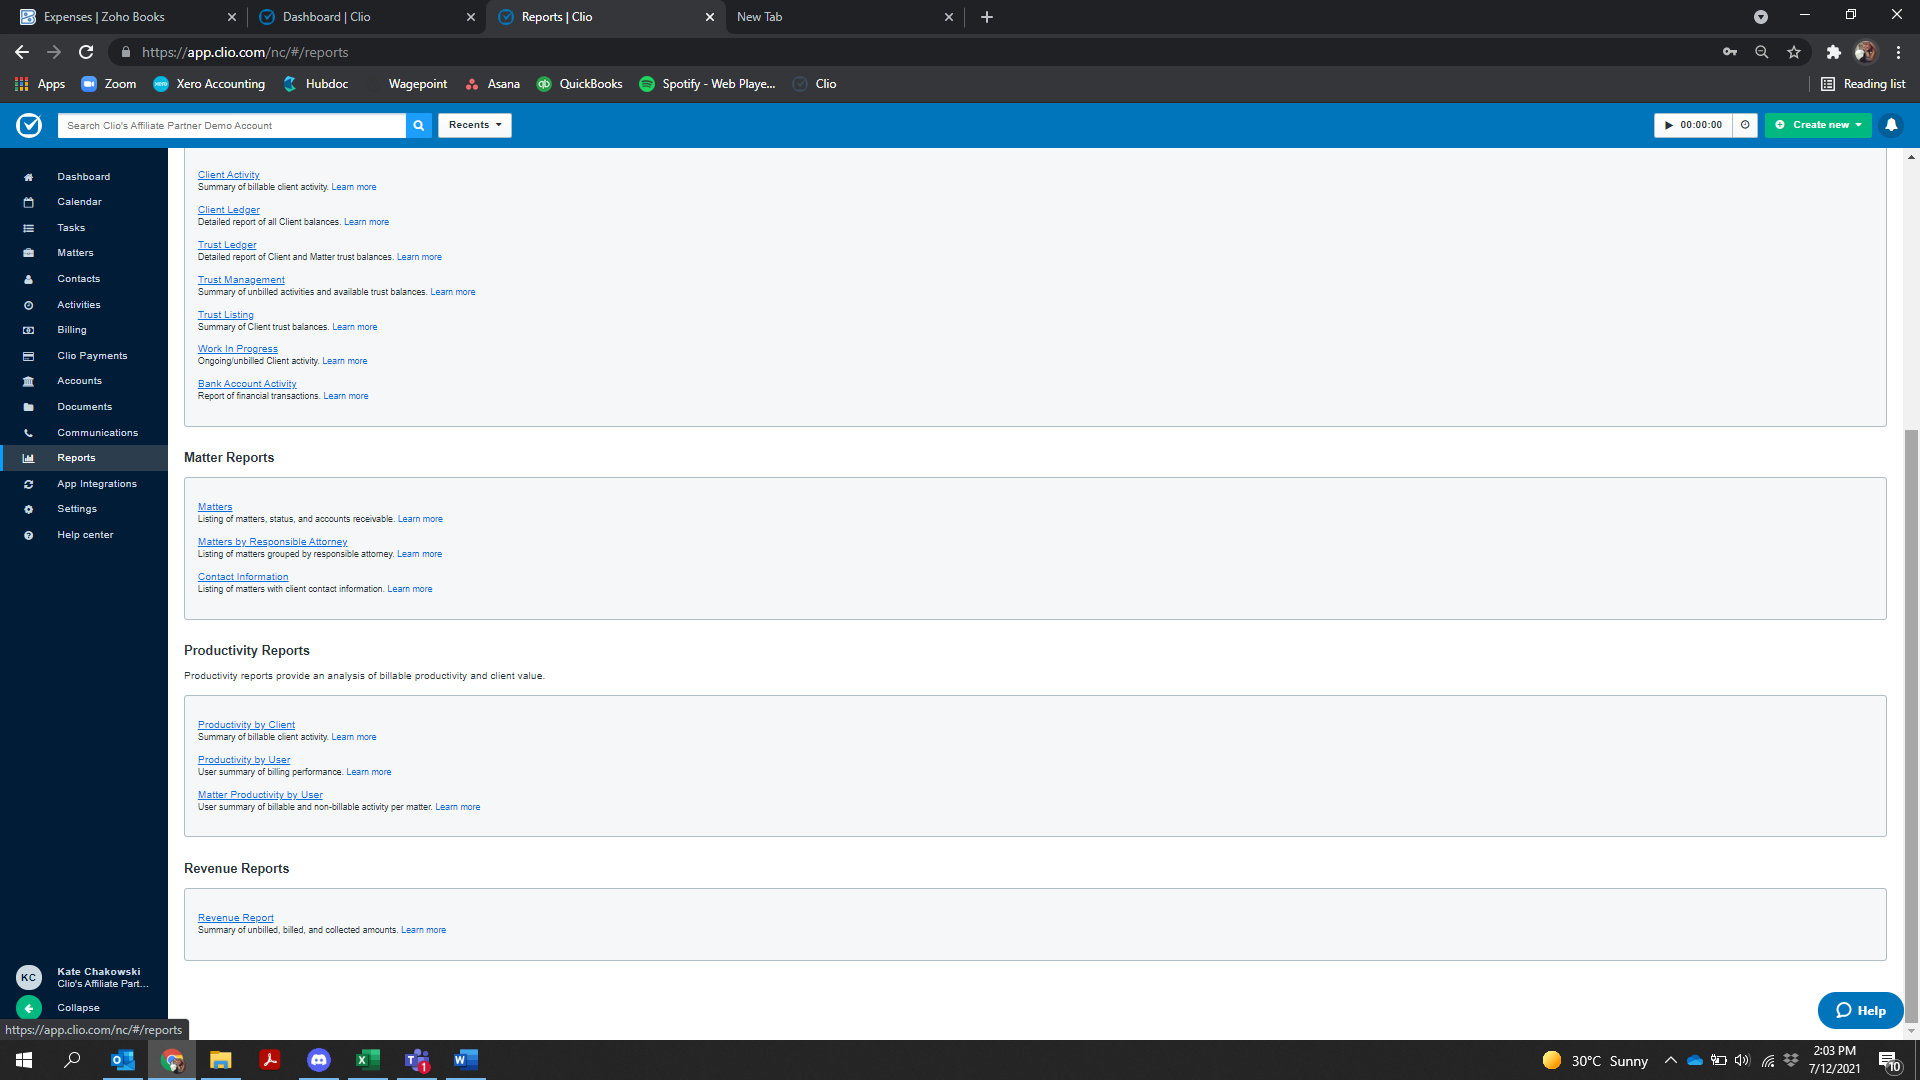
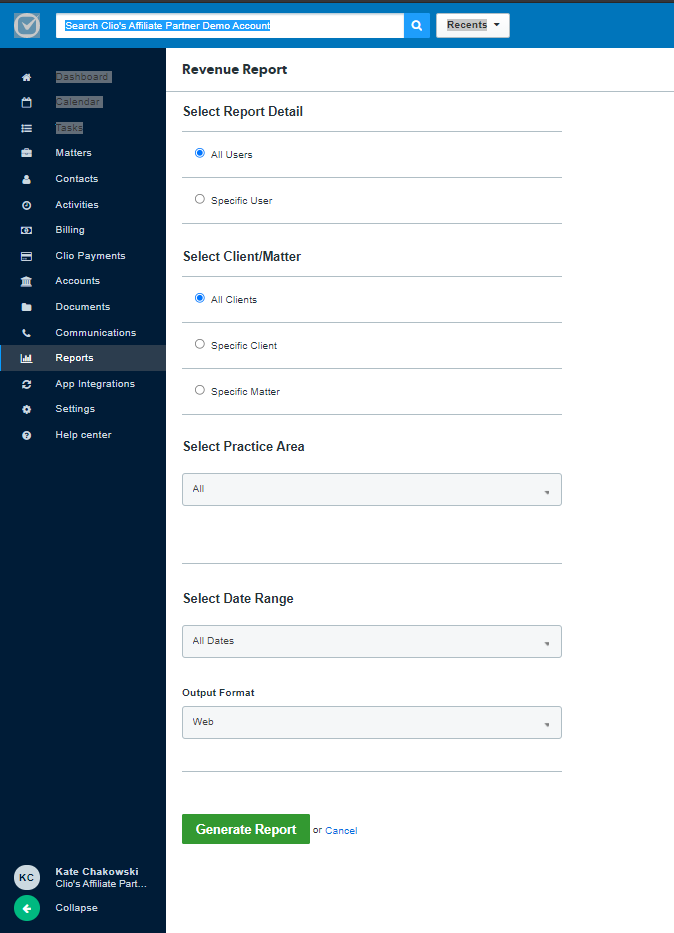
3. Pull a Revenue Report in Clio
a. Click “reports” on the bar to the left of your screen;
b. Scroll down to “Revenue Report”;
c. Ensure All users, all clients and all practice areas are selected. Change the dates for the report you wish to pull. Normally this would be the previous month. Change your output format to PDF.
4. Make note of the Billed Tax 1 and Billed Tax 2 amounts at the bottom of the page
a.Tax 1 is GST, and Tax 2 is PST. Save this document.

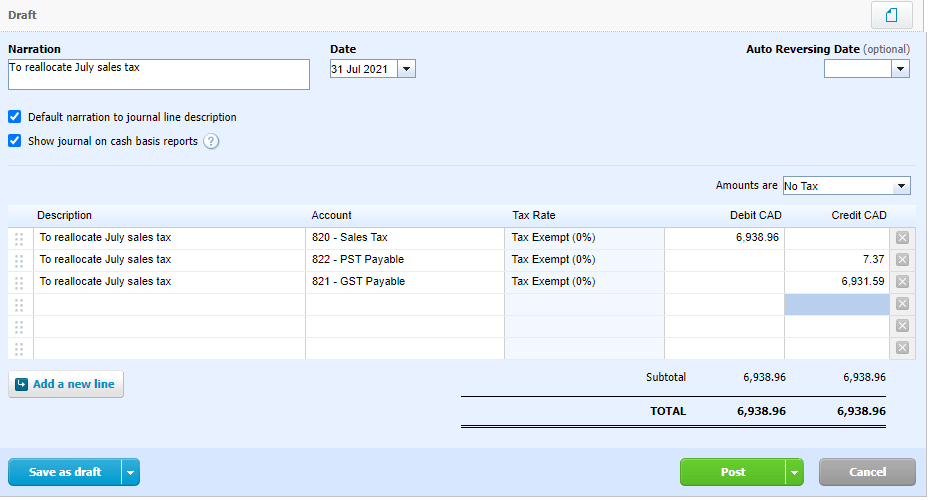
5. In Xero, create a journal entry to remove each of the GST and PST amounts from the “sales tax” account and debit it into either the “PST Payable” or “GST Payable”
a. From your Xero Dashboard, click “Accounting” on the top bar. Click Manual Journals from the dropdown menu.
b. Click “New Journal”
c. Enter “Sales Tax Clearing” or “to Reallocate [Month] sales tax” under the Narration box. Change the date to the last day of the month that you pulled the Clio report for.
d. Create three lines in the Journal. One for your sales tax account, one for your PST Payable account and another for your GST payable account that you created. Credit your GST and PST payable accounts the applicable amounts shown on your Clio revenue report and Debit the balance to your Sales Tax account. This will remove the correct amounts from the general Sales Tax account and allocate it correctly to your GST/PST payable accounts.